Most people think a great headshot starts with a great camera. Professional photographers will tell you otherwise. The camera is almost secondary. Lighting is everything.
Consider this: LinkedIn profiles with professional headshots receive up to 21x more profile views. Yet the vast majority of people still rely on poorly lit selfies or hastily snapped photos with overhead fluorescents casting unflattering shadows under their eyes. The gap between "professional" and "forgettable" almost always comes down to one variable: how the light hits your face.
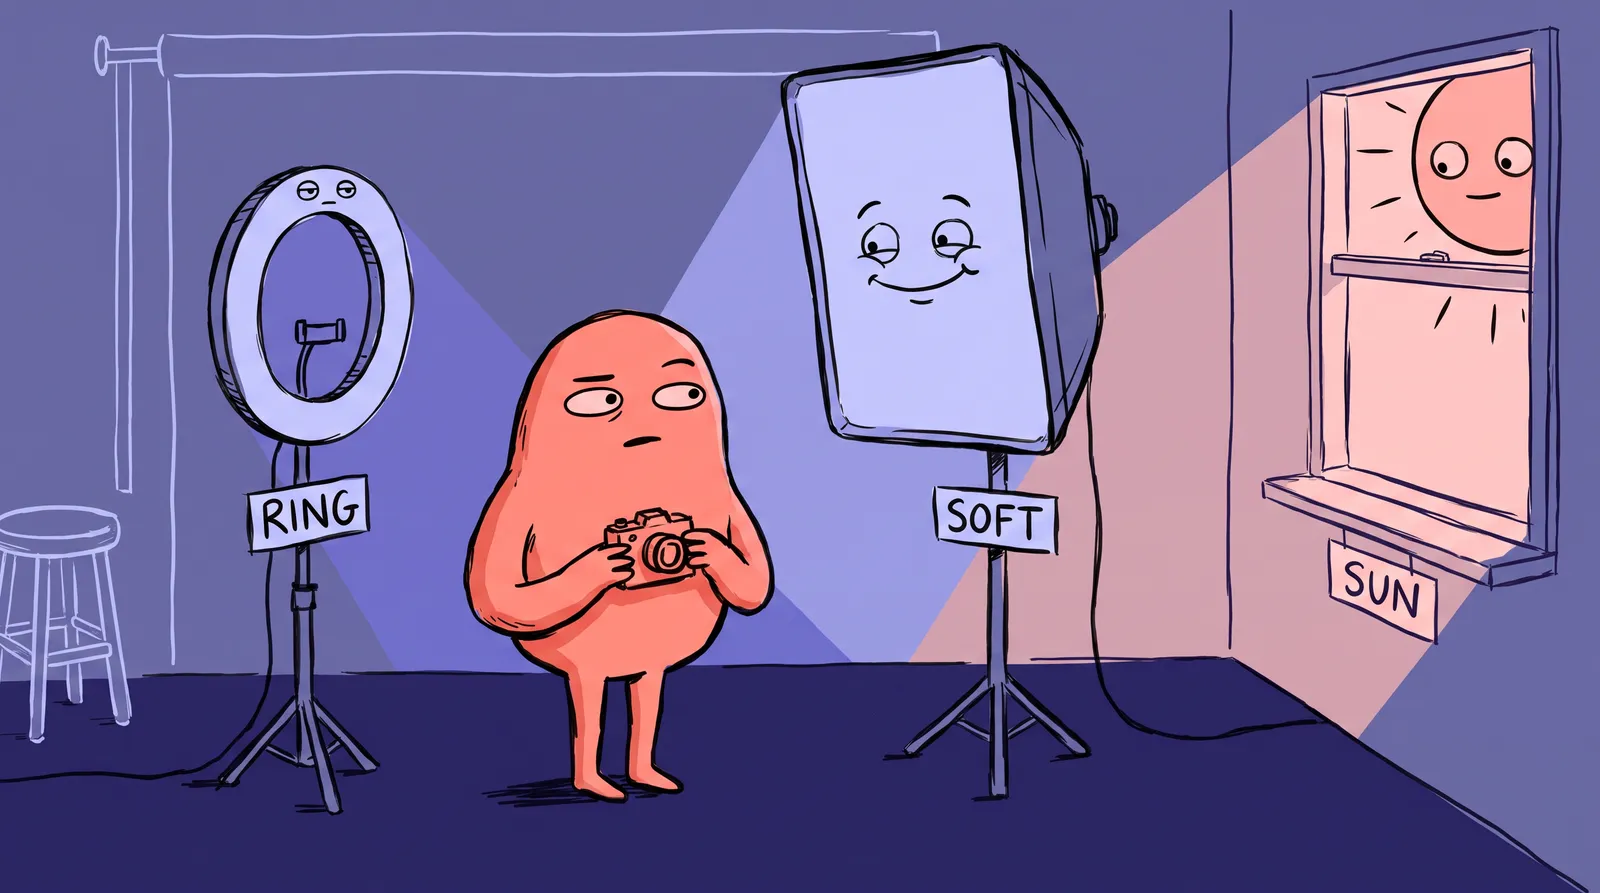
Three lighting approaches are worth comparing: ring lights, softboxes, and natural light. Each suits a different situation, whether you're a photographer building a client portfolio, a creator setting up a home studio, or someone who just needs a decent LinkedIn photo. It's worth knowing either way, because even AI headshot tools like Starkie AI produce much better results from a well-lit source photo.
Why lighting makes or breaks a headshot
Light does more than illuminate a face. It sculpts it. The direction, quality, and color of your light source determine whether someone's features look defined and three-dimensional or flat and washed out.
Two quick concepts will help frame everything that follows.
Hard light and soft light come first. A small, direct light source (like bare flash or midday sun) creates hard light with sharp, defined shadows. This can amplify skin texture and imperfections. A large, diffused source (like a softbox or overcast sky) wraps around the face, producing gentle shadow transitions that smooth skin and flatter nearly everyone. For headshots, soft light wins almost every time.
Color temperature is the second. Light color is measured on the Kelvin scale. Standard daylight sits around 5600K, producing clean, neutral white. Tungsten light is around 3200K, warmer and more golden. Most 2026-era LED lights offer bi-color or tri-color adjustability, letting you dial in exactly the warmth you want.
Three more terms come up repeatedly. Catchlights are the small reflections of your light source visible in a subject's eyes; without them eyes look dull, and their shape gives away the source (circular for ring lights, rectangular for softboxes). Diffusion means scattering light through translucent material to soften it, like a sheer curtain over a sunny window. And the inverse square law, in plain English, says that doubling the distance between light and subject drops the intensity to a quarter rather than a half, which matters a lot for how light falls off across a face.
Different skin tones also respond differently to light. Warmer sources like tungsten or golden-hour sunlight tend to beautifully complement deeper skin tones. Cooler, neutral daylight-balanced sources work broadly across the spectrum. And face shape interacts with light placement too. Broad lighting (illuminating the side of the face turned toward the camera) widens features. Short or Rembrandt lighting (illuminating the side turned away) slims the face and adds drama.
Understanding these fundamentals matters more than any single piece of gear.

Ring lights: The creator's favorite, but are they right for headshots?
A ring light is a circular LED fixture with a hollow center where your camera lens sits. This design floods the face with even, frontal illumination that wraps around the lens axis, minimizing shadows.
The advantages are genuine. Ring lights are cheap, with compact 10-inch beginner models starting around $20 to $40 and larger professional 18-inch to 22-inch units running $80 to $150. Setup takes two to three minutes. Plug it in, position it at eye level, and you're shooting. Brands like Lume Cube Ring Light Pro, Razer Ring Light, and budget options from Ubeesize and AiXPi cover every price point.
The signature circular catchlight in the eyes has become almost synonymous with social media content. For beauty shots, vlogs, and video calls, ring lights deliver consistent, flattering results with virtually zero learning curve.
The catch is that the same flat, frontal light that eliminates shadows also eliminates depth. Faces can look one-dimensional. In a formal headshot context, the donut-shaped catchlight reads as "social media creator" rather than "senior executive." You also have very little control over light shaping. What you see is what you get.
They work best for beauty and makeup content, casual social profile photos, video calls and streaming setups, and for anyone learning lighting fundamentals from scratch.
If you're committed to one, position it at exact eye level to maximize the catchlight, attach a warm diffusion gel for better skin tones, and angle your subject's face slightly to one side. Even five degrees of turn brings in enough shadow to avoid the flat passport-photo look.
Softboxes: The studio standard
A softbox encloses a light source (strobe or continuous LED) and diffuses it through a translucent front panel. The result mimics the soft, directional quality of a large window. It's the gold standard for professional portrait and headshot photography for good reason.
Control is what you're paying for. By adjusting the size, distance and angle of a softbox, you can sculpt light precisely. You get flattering soft shadows that define cheekbones and jawlines without harshness. Softboxes come in square, octagonal, and strip shapes, ranging from 24 inches to over 60x80 inches. Brands like Godox, Westcott, Profoto, Nanlite, and Neewer offer options at every budget tier.
For 2026 pricing, complete kits (like the Godox SK400II two-head studio flash kit or Neewer NK103 Softbox Kit) run from about $80 to $300 and up. Premium options from Profoto and Chimera go higher, but you're paying for durability and precision.
The cost is convenience. More gear means 10 to 20 minutes of setup, more space and a steeper learning curve, and a softbox will not fit in a bag the way a ring light does.
The one-light softbox setup that pros actually use
This setup costs under $300 and replicates what most professional headshot photographers use in the studio.
- Place a single softbox (octagonal or rectangular, 24 inches or larger) at a 45-degree horizontal angle to your subject.
- Position it slightly above eye level, angled down at roughly 30 degrees.
- Set the softbox 2 to 3 feet from the subject's face.
- On the opposite side, place a white foam board reflector to bounce light back into the shadow side, filling in dark areas without adding a second light source.
This creates what's often called Rembrandt-adjacent lighting: a defined triangle of light on the shadow-side cheek, soft transitions, and natural-looking rectangular catchlights. It's flattering across all skin tones and face shapes.

Natural light: The free option that can outperform both
Some of the most celebrated portrait photographers in history, including Annie Leibovitz and Yousuf Karsh, used or supplemented with natural light. And for good reason. When used correctly, diffused window light can rival expensive studio gear.
The rules are simple. Always use indirect, diffused window light. North-facing windows in the northern hemisphere are the holy grail because they provide consistent, soft, shadow-free light throughout the day with no direct sun streaming in. If you only have south- or west-facing windows, hang a sheer curtain or tape translucent paper over the glass to diffuse harsh beams.
Weather is your friend or your enemy. Overcast days act as a giant natural softbox, scattering sunlight through cloud cover. Early morning and late afternoon provide warm, golden tones. Harsh midday sun? Skip it entirely.
For the setup itself, position yourself at 45 to 90 degrees relative to the window. Place a white foam board (about $15 from any craft store) on the shadow side to bounce light back and fill in dark areas. That's it. Total investment: under $20 if you already have a camera or smartphone.
The limitations are real. You can't control weather, time of day or seasonal changes. Overcast days introduce a blue color cast that requires white balance correction. And if you're shooting clients on a schedule, "Sorry, it's too cloudy today" isn't a viable excuse. Natural light simply doesn't work in windowless spaces or evening shoots.
Understanding light quality: The foundation everything else builds on
Before comparing gear, you need to understand two things about light that affect every portrait you'll ever take.
Hardness and softness come down to the size of the light source relative to the subject. A small, distant light (like bare flash or direct midday sun) creates hard shadows with sharp edges. A large, close light (like a big softbox or an overcast sky filling a window) creates soft shadows that wrap gently around the face. According to Candid Studios' portrait lighting guide, soft diffused light reduces harsh shadows and highlights, making it especially flattering for portraits.
Directionality is the other. Flat, frontal light hits the subject straight-on, eliminating shadows. That sounds nice until you realize shadows are what define cheekbones, jawlines, and eye sockets. Without them, faces look lifeless and two-dimensional. Off-axis light, coming from the side and slightly above, sculpts the face with natural shadow gradients.
Then there are catchlights, the small reflections visible in a subject's eyes. These tiny details signal the lighting setup used. A ring light produces a distinctive donut shape. A softbox creates a rectangular or square glow. Window light produces a soft, diffused crescent. Each one subtly changes how "professional" the image feels to a viewer.

Each light source below is scored on five criteria: light quality, skin tone versatility, ease of control, cost, and how well it feeds an AI headshot generator.
Quick-reference: Mistakes to avoid and pro tips to steal
Top mistakes
Shooting with the light behind you gives you a silhouette, so always face your key light. Lighting only from overhead pools deep shadows in the eye sockets and under the chin, so bring the light down to eye level. Ignoring color temperature costs you natural skin tones: aim for 3000K to 4500K, since household "warm white" bulbs at 2700K run orange and "daylight" bulbs at 5500K and above skew blue. And a distracting background undoes everything else, so keep it clean and stand at least four feet in front of it for natural separation and blur.
Pro tips (no extra gear needed)
Use your phone's portrait mode for natural background blur. Shoot in burst mode and pick the sharpest frame, since the best expression usually comes out of micro-movement rather than a held pose. And wear solid mid-tone colors: navy for trustworthy and universal, charcoal gray for authority, deep teal or burgundy for something more modern with depth. Pure white blows out detail, pure black absorbs light and goes flat, and neons throw unnatural color onto your neck and jaw.
Camera angle fundamentals
Position your camera at or very slightly above eye level. Never below, which emphasizes the chin and distorts proportions. Maintain a natural distance of 3 to 5 feet so the lens doesn't warp your facial features.
Your pre-shoot checklist
- Clean your camera lens
- Fully charge your phone or camera
- Tidy the background
- Set light at eye level
- Check your outfit on camera
- Set a 10-second timer
- Shoot 20-30 frames for variety
- Choose the sharpest frame with the most natural expression

Head-to-head: Choosing the right light for your situation
A comparison across the dimensions that matter most:
| Dimension | Ring Light | Softbox | Natural Light |
|---|---|---|---|
| Cost | $20-$150 | $80-$300+ | Free (+ $15 reflector) |
| Ease of Use | High (plug & play) | Low (assembly required) | Medium (requires positioning knowledge) |
| Portability | High | Low (bulky) | Best (if a window exists) |
| Light Quality | Good (even, shadowless) | Best (directional, sculpting) | Excellent (when diffused properly) |
| Consistency | High | High | Low (weather-dependent) |
| Professional Versatility | Limited | Extensive | Moderate |
For a budget-conscious DIY professional, natural light wins. A north-facing window, a foam board reflector and a phone on a tripod produce LinkedIn-ready headshots for almost nothing.
For a content creator or streamer building a home studio, the ring light wins on fast setup and consistency, and it doubles as your video call lighting.
For a photographer shooting client work, the softbox wins decisively. The control and consistency justify the spend for anyone charging money for the result.
Case study: How one lighting change transformed a DIY headshot session
Alex, a marketing professional, needed updated LinkedIn headshots in July 2026 and couldn't justify a $400-plus photographer fee. Over one weekend, Alex tried all three setups.
The ring light selfie came out flat, bright and smooth. Fine for Instagram. But the donut-shaped catchlight and lack of facial dimension felt too casual for a senior corporate profile. The overall vibe screamed "content creator," not "marketing director."
The softbox came from a rental; many camera stores do day rentals for $30 to $60. Alex set up a single octagonal softbox at 45 degrees, slightly above eye level, with a foam board reflector opposite. The difference was immediate. Subtle shadows defined cheekbones. The rectangular catchlights looked natural. Color temperature was dialed to 5500K daylight balance. The result looked like a professional studio session.
Natural window light, on an overcast afternoon, used a north-facing window, a sheer curtain diffuser and a white foam board reflector. The results were nearly indistinguishable from the softbox setup in terms of softness and flattery. Slightly cooler in tone, but easily corrected with a minor white balance adjustment.
The lesson Alex drew was that the best light has little to do with the most expensive gear and a lot to do with understanding quality and direction. All three setups produced usable results, and the softbox rental gave the most polished and versatile output for a professional audience.

The AI headshot connection: Why good lighting is the secret to better AI results
All of this applies when you're submitting source photos to an AI headshot generator like Starkie AI, for a specific reason.
AI headshot generators don't simply edit your selfie. They generate a new, professional image based on visual information from your source photo, reading your facial structure, shape, and unique features to produce the output. When your input photo has clean, even lighting with visible facial details, the AI model has a strong foundation to work from.
When you submit a poorly lit photo, dim with ceiling-light shadows or blown out by harsh flash, the model is forced to invent details it can't see. Hidden features get "guessed" at, leading to distorted, unrealistic, or un-resembling results. Premium AI generators are trained on curated datasets of high-quality professional photography. Submitting input images that approximate that lighting quality gives the model its best chance at accuracy.
For AI headshot inputs specifically: use soft even lighting from the front or at 45 degrees (ring light or softbox both work), avoid strong backlighting and one-sided harsh shadows, shoot at daylight color temperature between 5000K and 6500K, and make sure the face is sharp, well-exposed and clearly visible.
Starkie AI turns a well-lit source photo into a polished professional headshot without a session to schedule or gear to rent. The better the input, the better the output, which is why the lighting fundamentals here pay off either way.
Light first, gear second
Great headshots aren't about the camera. They never were. They're about the light.
The verdict is straightforward. Natural light wins on budget and accessibility, ring lights win on convenience for creators, and softboxes win on professional quality and control. Which one is right depends on your use case and your budget.
What matters more than any of the equipment is understanding light quality, direction and color temperature. Someone who understands those with a $15 foam board will outshoot someone with a $600 softbox kit who doesn't.
Pick a path. Move your desk next to a north-facing window this weekend, rent a softbox from your local camera store, or take your best-lit photo and upload it to Starkie AI.